Build the To-Do Client
Author: MongoDB Documentation Team
This tutorial walks you through building an app that uses Stitch for the backend, and enables users to create and maintain to-do lists.
Time required: 20 minutes
What You’ll Need
If you have not yet built the To-do backend, follow the steps in this guide.
Procedure
Now that you’ve set up a Stitch backend for your to-do application, you need a client application so that users can add, view, and complete to-do tasks. To help you get started, we’ve created client applications that include all the files and components you’ll need to follow this tutorial.
- JavaScript
- Android (Java)
- iOS (Swift)
- GraphQL
A. Get the Base To-Do Client Application
Estimated Time to Complete: ~10 minutes
Clone the Client App Repository
To get a local copy of the client application GitHub repository on your computer, clone the repo by running the following command in a terminal:
Install the App’s Dependencies
After you’ve cloned the repository to your computer, run the following code in your terminal to navigate into the repo and install the app’s dependencies:
Stitch Browser JS SDK
The base application that you cloned already lists the Stitch Browser SDK as a dependency so this step installs the SDK along with the other dependencies. For other applications, you can install the SDK from npm with the following command:
Explore the Code and File Structure
The web client is a standard React web application scaffolded with create-react-app. We encourage you to explore the files in the app for a few minutes before you continue the tutorial. This will help you to familiarize yourself with what the app contains and where you’ll be working.
Stitch
The /src/stitch directory contains all of the code you’ll use to
connect the application to Stitch. Each file in this directory exports
functions and objects that encapsulate the Stitch component it’s named
after. These files are only incomplete scaffolds. This tutorial walks
through adding the missing code in these files to connect the app to
Stitch.
React Components
The /src/components directory contains pre-built React components
based on components from the reactstrap library and styled with
Emotion. The components import code from the files in /src/stitch
and use them to interact with Stitch. We’ve already completely
implemented the React components so you won’t need to add any code to
the component files.
B. Integrate Your Stitch App
Estimated Time to Complete: ~10 minutes
Once you’re a little more familiar with the app’s file structure
it’s time to get down to business and connect the app to Stitch.
In this section you’ll be adding code to the following files in
/src/stitch:
app.jsmongodb.jsauthentication.js
After you complete this section the to-do client application will be connected to your Stitch backend and you’ll be able to add, complete, and hide to-do tasks through the app.
Connect to Stitch
The first thing that you need to do is connect the client application to your Stitch backend. In this step, you’ll instantiate an app client that provides objects and methods for interacting with Stitch. You need an app client to authenticate users, call Functions, and instantiate service clients.
To get started, navigate to the stitch-tutorial-todo-web
repository and open the file /src/stitch/app.js. The file is
incomplete and you will need to add some code to make the app work.
The file should look like this when you first open it:
At the top of the file we import an object named Stitch from the
Stitch Browser SDK. This object contains methods that instantiate and
manage Stitch app clients. Each app client is associated with a single
Stitch app that you specify by providing an App ID when you
instantiate the client. At the bottom of the file we export the
app object, which should contain an app client for your Stitch
app.
There are two things you need to do to connect the to-do client to Stitch:
Replace
<YOUR APP ID>with the App ID of your Stitch to-do app.Find Your App ID
You can find your Stitch app’s App ID at the top of the left-hand navigation in the Stitch UI. Click the Copy button ( copy icon ) to copy it to your clipboard.

Instantiate an app client in the
appvariable by adding the following code:
The Stitch object stores initialized app clients and throws an
error if you attempt to initialize a second client with the same App
ID, so we use a ternary expression and three
methods on the Stitch object to create an app client. The ternary
checks to see if an app client has already been inititialized and, if
so, uses that instead of initializing a new app client.
Once you’ve added the code to app.js your client application is
connected to Stitch! In the next steps you’ll use the app that you
initialized and exported to actually interact with Stitch and MongoDB
Atlas.
Instantiate a MongoDB Collection Handle
The To-do app stores to-do items in the MongoDB collection
todo.items. You already defined rules for the collection in your
Stitch app, so all you need to start running queries is a collection
object that exposes MongoDB actions.
To get a handle for the todo.items collection, open the file
/src/stitch/mongodb.js. The file should look like this when you
first open it:
At the top of the file we import a RemoteMongoClient object from
the Stitch Browser SDK and the app that you defined and exported
from app.js. The SDK will use the RemoteMongoClient to create
a MongoDB service client that provides methods for interacting with
your linked cluster. At the bottom of the file we export the items
object, which should contain a collection handle that you can use to
query the todo.items collection.
There are two things you need to do to create the collection handle:
Instantiate a MongoDB service client in the
mongoClientvariable by adding the following code:MongoDB Service Name
The default cluster If you chose to name your linked MongoDB Atlas cluster something other than the default name, make sure to use that name when you get the service client.
Get the collection handle by adding the following code:
The app client provides a generic getServiceClient method that
instantiates service clients for all Stitch services. To specify that
the client is for a particular MongoDB service we provide a factory
function from the RemoteMongoClient object and the name of the
MongoDB service. The MongoDB service client that the method returns is
similar to a MongoClient in a standard MongoDB driver. Given that,
we can instantiate a collection handle by calling the db and
collection methods.
How We Use It
In our React app, we use the collection handle that you
instantiated to find, add, modify, and remove documents in the
todo.items collection that represent a user’s to-do tasks. We
write each query inside of a function that we return from the
useTodoItems hook. Each function waits for its query to finish
and then updates the React application state based on the query
result by calling the dispatch function.
Set Up Anonymous User Login
Now that you’ve added the code to mongodb.js, your client
application has a way to query MongoDB. However, Stitch requires that
all requests be made by a user that has logged in through an
authentication provider. Stitch allows you to
configure one or more authentication providers that you can use to
authenticate your app’s users and log them in. You already enabled
Anonymous authentication in your Stitch app, so all that’s left to do
is use the app.auth object to set up the authentication functions
that the to-do client calls.
To set up anonymous authentication in your client app, open the file
/src/stitch/authentication.js. The file should look like this when
you first open it:
At the top of the file we import an AnonymousCredential object
from the Stitch Browser SDK and the app that you defined and
exported from app.js. The AnonymousCredential is an object
that we use to log in to Stitch as an anonymous user. The SDK also
provides credential objects for each of the other authentication
providers that Stitch supports, but you won’t need those for now. The
file exports four incomplete functions that we use in our React
components to handle user authentication.
To allow your users to log in and store to-do tasks in Stitch, you need to add code to make the exported authentication functions work.
The main thing you need to do is actually handle a user login request.
To do so, add the following code to the loginAnonymous function:
You’ll also need to check if a user is currently logged in. Add the
following code to the hasLoggedInUser function:
If there is a logged in user, we want to be able to access their user
object. Add the following code to the getCurrentUser function:
A logged in user should be able to log out of the to-do app. Add
the following code to the logoutCurrentUser function:
How We Use It
In our React app, we use the authentication functions that you just
completed to log users in and out, route logged out users to the
login screen, and associate the logged in user’s id with their
to-do tasks. We encapsulate this logic inside of a global app state
that we modify using the handleAnonymousLogin and
handleLogout functions. We expose the authentication state and
functions to the app through React context in the StitchAuth component.
Run the To-Do Client Application
Once you’ve added the code to authentication.js you should be able
to log in and track to-do tasks. To run the app, navigate to the root
of the stitch-tutorial-todo-web directory and run the following
command:
The start command builds and serves a local copy of the
application. Once the command output indicates that it is serving the
app, open your browser to localhost:3000 to view the to-do client.
The app should show a login screen when you first start it. Click Log in Anonymously to log in as a new user and then add and check off some to-do tasks. If everything works, then you’ve successfully built the base to-do client!
A. Get the Base Client Application
To get started, clone the client application GitHub repository by running the following command in a terminal:
The client application repo uses tags to mark good places to start each
tutorial. For this tutorial, run the following command to fetch
the tutorial-1 tag:
B. Build and Run the Application
Open the project in Android Studio
- Open Android Studio.
- Select Open an existing Android Studio project.
- Navigate to the downloaded example directory and click Open.
Update project with your MongoDB Stitch App ID
From the Project view:
- Go to the
stitch-tutorial-todo-android/src/main/res/valuesfolder and open thestrings.xmlfile. - Update the
stitch_client_app_idwith your MongoDB Stitch app id and save.
Find Your App ID
You can find your Stitch app’s App ID at the top of the left-hand navigation in the Stitch UI. Click the Copy button ( copy icon ) to copy it to your clipboard.
Initialize the App Client
You will now add the code needed to
initialize the StitchAppClient.
The StitchAppClient class provides all of the functionality for your app to
communicate with the Stitch backend, including accessing the
Authentication providers and
Atlas service.
In the onCreate method of the TodoListActivity.java file, find
the // 1. Instantiate the Stitch client comment, and uncomment the
next line. Add the code to instantiate a StitchAppClient object. When
complete, your code should look like the following:
Instantiate a MongoDB Client
For your app to communicate with MongoDB (Atlas), you need to create a RemoteMongoClient object.
In the onCreate method of the TodoListActivity.java file,
find the // 2. Instantiate a RemoteMongoClient comment, and uncomment
the next line. Add the code needed to create the RemoteMongoClient. You should call
the getServiceClient()
method on the client object, passing in the RemoteMongoClient.factory and
the name of your MongoDB service.
Note
By default, the MongoDB service in Stitch is named “mongodb-atlas”. If you provided a different name when setting up your Stitch backend, be sure to use that name here.
When complete, your code should look like the following:
Create a RemoteMongoCollection
You now need to create a
RemoteMongoDatabase
object to point to the todo database, and then create a
RemoteMongoCollection
object that points specificallty to the items collection. Your code will
then use the RemoteMongoCollection for all CRUD operations against the
collection.
When you instantiate a RemoteMongoCollection object, you specify the name of the collection and the class that represents the data structure of the data stored in that collection. When storing a Java object in MongoDB, you need to define a custom Codec for your object, and pass that to the withCodecRegistry() function.
At the end of the TodoItem class, you will find the Codec we have created
for the TodoItem object:
In the onCreate method of the TodoListActivity.java file,
find the // 3. Set up the items collection comment, and uncomment
the next line. Add the code needed to call the
getDatabase(),
getCollection(),
and withCodecRegistry() functions to create a
RemoteMongoCollection
object. When complete, your code should look like the following:
Run the todo app
Click Run.
If no virtual device is available, click Create New Virtual Device.
Select the Phone device for your app. You can select any of the deviuce definitions.
Click Next.
On the System Image tab, you are presented with a list of Recommended images, all of which are x86-based. You must switch to the Other Images tab to see the full list of images, including those platforms supported by Stitch. Select one of the supported platforms (an ARM32, ARM64, or x86_64 device that is running an armeabi-v7a, arm64-v8a, or x86_64 image of Android 5.0 or later), and, if neccessary, click Download to download the image.
Default images
The list of Recommended images only contains
x86images, which Stitch does not support. You must switch to the Other Images tab to see the full list of images.Click Finish.
Select the virtual device from the Available Virtual Devices.
Click OK.
Wait for the device to come online.
Sign in using anonymous login.
A. Create a New Application
Optional Step
If you do not want to go through the intial project setup and would prefer to jump right into the code, you can clone the Stitch github example repository, or download the zip file for the repo and unzip it, then proceed to the next step.
Throughout this tutorial, if you wish to follow along and see the code you can do so by checking out git tags that correspond to the end of the previous step.
Every step will include information about which tag to checkout, like the following.
Git Tag
This step corresponds to git checkout step0
Estimated Time to Complete: ~4 minutes
Create a New Xcode Project.
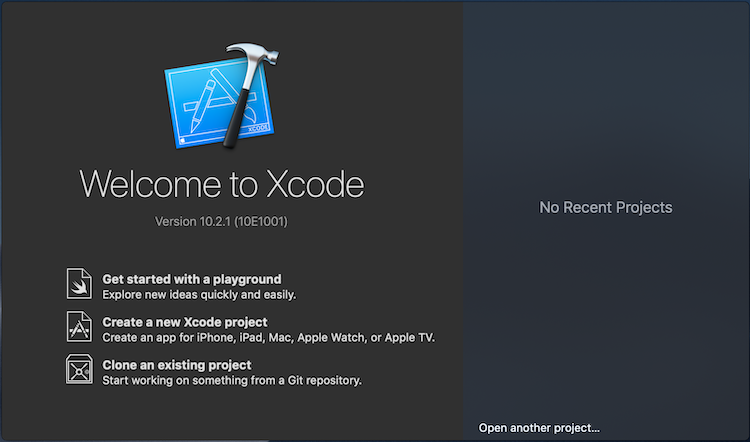
Start Xcode, and create a new project by clicking on Create a new Xcode project or by navigating to File > New > Project.
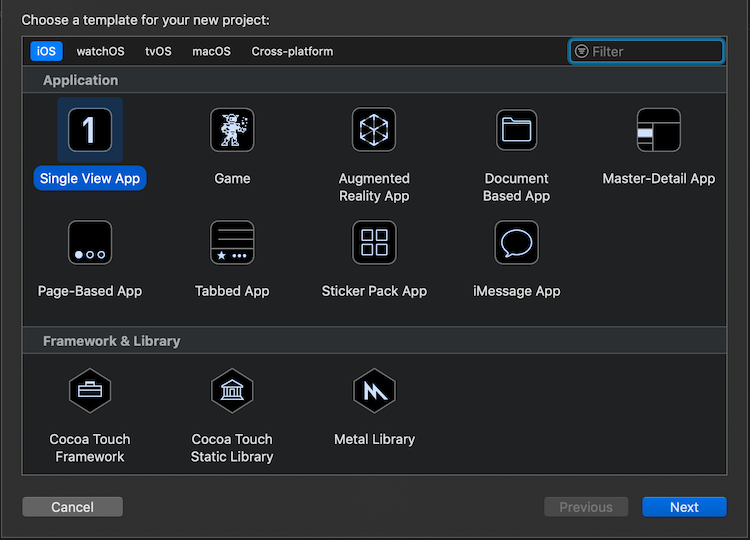
Single View App.
On the template screen within Xcode, ensure iOS is selected as your platform,
and select Single View App as the application type. Then click Next.
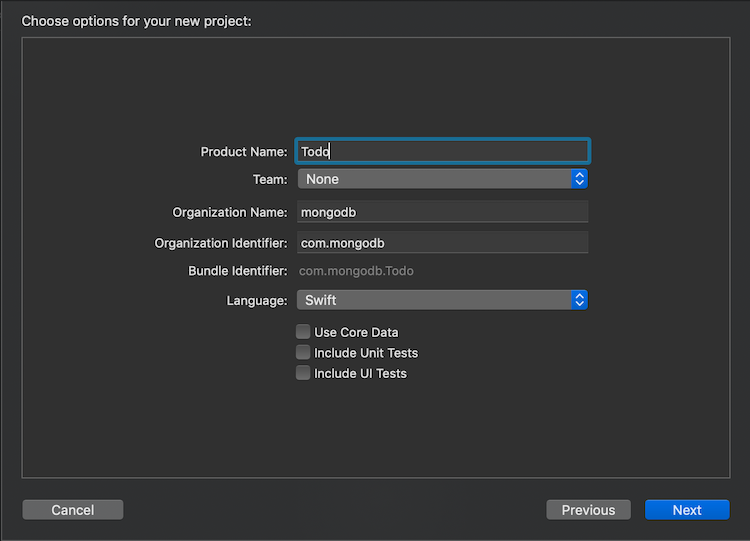
Name the Application.
Name the product Todo, and ensure Swift is selected as the language,
then click Next.
Test Application Setup
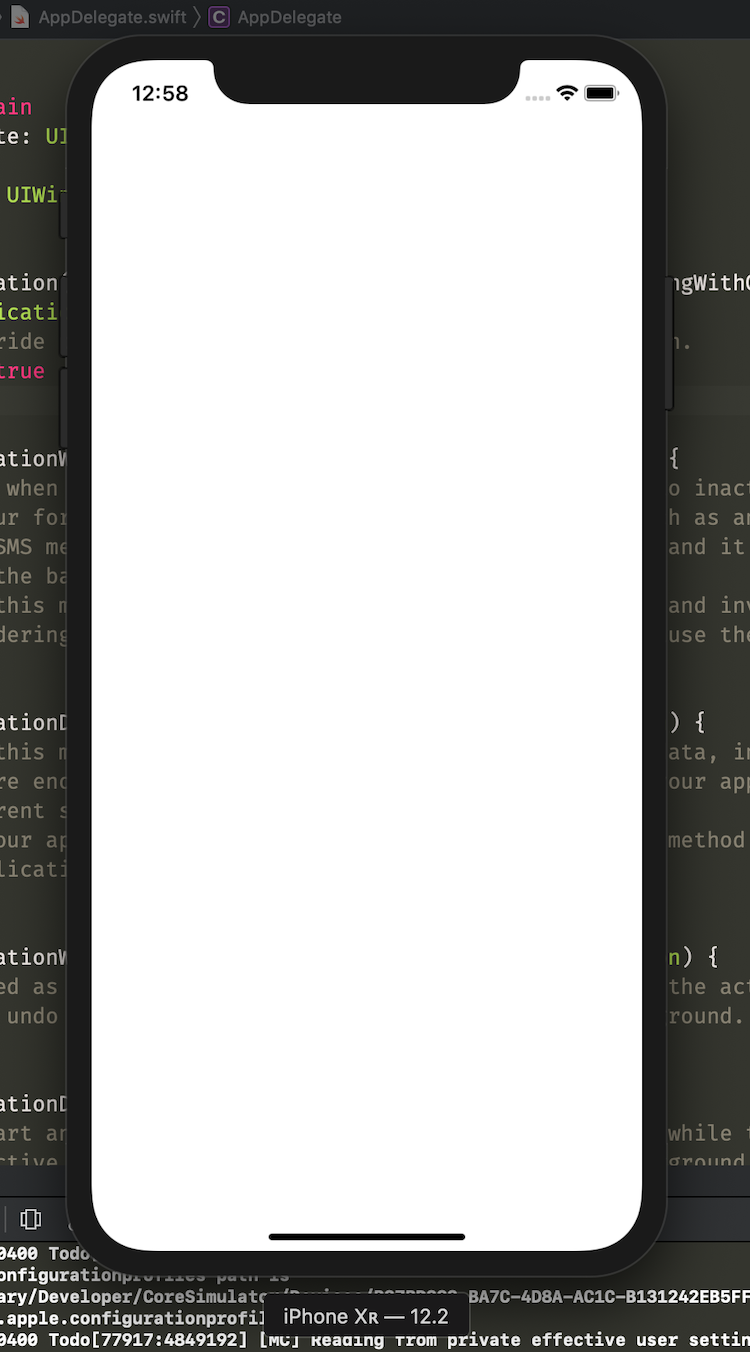
You should now be greeted with the Xcode project window. Let’s go ahead and ensure that everything is correctly set up before we dive into using Stitch.
In the upper left corner of the window, ensure Todo is the selected project. For this tutorial we’ll be using the iPhone XR in the simulator. With these selected, click on the run button, and you should be greeted with a blank simulator screen.

B. Build and Run the Application
Estimated Time to Complete: ~15 minutes
Install the Pods
Required Step
This is a required step and can not be skipped by following along with the git tags. The Pods are not included in source control.
To checkout the code at this point, enter git checkout step1
This project uses CocoaPods to manage dependencies, which means you need to install the pods before building the project. To do so, follow these steps:
- In a terminal window, navigate to the
todo-iosdirectory. - Run
pod init - In the newly created
Podfile, addpod 'StitchSDK', '~> 6.0.0'on a new line afteruse frameworks!. - Run
pod install --repo-updateto install the project dependencies.
Open the Project
After executing pod install, Cocoapods will generate a new workspace for
your project called Todo.xcworkspace.
Open the workspace file Todo.xcworkspace:
Your Xcode workspace should look similar to the following:
Run the Todo app again to ensure everything is working correctly. You may see some build warnings, however, the iOS simulator should launch again and you should see another blank white screen.
Remove Unnecessary Files
To checkout the code at this point, enter git checkout step3
Let’s delete files and information that aren’t necessary.
- Open the
Info.plistfor your target. - Find the
Main storyboard file base nameentry and remove it by pressing the-icon next to it in the property editor. - Find the
Main.storyboardfile in Xcode’s navigator and delete it. ChooseMove to Trashin the confirmation dialogue.
Create a Constants File
To checkout the code at this point, enter git checkout step5
Next, let’s create a new file to contain our app’s constants. We’ll create a single source of reference to hold information about our database and collection name, as well as the Atlas Service name and our Stitch APP ID.
Find Your App ID
You can find your Stitch app’s App ID at the top of the left-hand navigation in the Stitch UI. Click the Copy button ( copy icon ) to copy it to your clipboard.
- Create a new Swift file by selecting
File > New > File..and selectingSwift Filefrom the type selector panel. Pressnext, then enterConstantsfor the file name. Ensure the file is created and saved in your project. - Paste the following code into
Constants.swift. Ensure you updatestatic let STITCH_APP_ID = ...to your own APP ID.
Note
By default, the MongoDB service in Stitch is named “mongodb-atlas”. If you
provided a different name when setting up your Stitch backend, be sure to
change ATLAS_SERVICE_NAME to match.
Initialize the Stitch App Client
To checkout the code at this point, enter git checkout step6
You will now add the code needed to
initialize the StitchAppClient.
The StitchAppClient class provides all of the functionality for your app
to communicate with the Stitch backend, including accessing the
Authentication providers and
Atlas service.
To initialize the StitchAppClient, you will call the
initializeAppClient()
function and pass in the ID of your Stitch backend app.
Add the following code to your AppDelegate.swift file.
Initalize the Remote MongoClient
To checkout the code at this point, enter git checkout step7
You will also add the code needed to Instantiate a RemoteMongoClient object, which provides connectivity support to Atlas.
To do this, call the serviceClient()
method on the mongoClient object, passing in the remoteMongoClientFactory
and the name of your MongoDB service.
Add the following code to your AppDelegate.swift file.
Initialize the Remote Mongo Database
To checkout the code at this point, enter git checkout step8
We must also create a RemoteMongoDatabase
object to point to the todo database, and then create a
RemoteMongoCollection
object that points specificallty to the items collection. Your code will
then use the RemoteMongoCollection for all CRUD operations against the
collection.
We’ve initialized the collection to be of type TodoItem, which we’ll set
up in the next step. We’re now finished with AppDelegate.swift
Create the TodoItem Model
To checkout the code at this point, enter git checkout step9
Let’s now create our TodoItem model.
- Choose
File > New > Filein Xcode and selectSwift File. ChooseNext. - In the
Save Asdialogue box, name the fileTodoItem.swift. - Paste in the following code.
We’ve imported MongoSwift to be able to use the ObjectId type. Our
TodoItem conforms to the Codable
protocol for serialization and deserialization to more easily work with
JSON/BSON.
We specify that id should map to _id, and ownerId should map to
owner_id. Remember, in MongoDB every document gets an _id field that
is unique to that document, and owner_id is the field that we specified
in our rules.
The last item of note is the didSet functionality of checked.
Whenever this field is modified, it will silently update this for us in the
database.
Create the WelcomeViewController
To checkout the code at this point, enter git checkout step10
It’s now time to create our WelcomeViewController.
Open
ViewController.swiftfrom the project explorer in Xcode.In the file, highlight
ViewController, just before: UIViewController.In Xcode, choose
Editor > Refactor > Rename. TypeWelcomeViewControllerand press theEnterkey on your keyboard. This will rename the class and the file.Paste in the following code. This will add necessary imports and define a
viewDidAppearmethod.
When this view is presented, we’ll check to see if there is a user already
logged in to Stitch. If so, we advance them to the next ViewController,
TodoTableViewController which we’ll create in the next step.
If a user isn’t logged in, we’ll create an alert prompting them to log in. For now, this will just use Anonymous login.
If there is an error logging in we use fatalError and log the description
of the error. This isn’t ideal but works for the purposes of this small
tutorial application.
If the login is successful, we push the TodoTableViewController into our
NavigationController, ensuring we do this on the main thread.
Create the TodoTableViewController
To checkout the code at this point, enter git checkout step11
We’ll now add our TodoTableViewController. After this step, we will be
able to interact with our Todo list, adding and deleting items and marking
them as done or not.
- In Xcode, choose
File > New > File. ChooseCocoa Touch Class, and clickNext. - Choose
UITableViewControllerin the dropdown next toSubclass of, and name the ClassTodoTableViewController. Do not check the box next toAlso create XIB file, and ensure theLanguageisSwift. ClickNext, thenCreate.
Paste in the following code, replacing the contents of the file.
On initializaiton, we check to make sure the user is still logged in. If
they are, we query through Stitch to get a list of the user’s Todo items,
if empty. We then load these into our todoItems which serves as our
datasource, and refresh the TableView.
If a user isn’t logged in, we send them back to the WelcomeViewController.
In viewDidLoad, we set the title of the TableView, and add a button
to allow users to create Todo items.
In the addTodoItem function, we present the user with a view so that
they can enter a new item. When they press “OK”, we optimistically add
the item to our todoList and refresh the TableView. In the callback,
we check for a .failure case and in that event remove the item from
the todoList and refresh the TableView.
The last few methods provide styling information as well as swipe right left functionality to mark an item as done or not, and to delete the item.
At this point, the application is nearly complete. You can run the application in your simulator, add items, mark them as completed or not, and delete items. Give this a try!
Add Logout Functionality
To checkout the code at this point, enter git checkout step12
In this last step, we’ll add the ability to logout of the application.
- In
TodoTableViewController.swift, add the following code within theviewDidLoadmethod:
This adds a logout button to the our TableViewController. Let’s implement the logout method now.
- In
TodoTableViewController, add the following code after theviewDidLoadmethod:
This will log the user out, and send them to the WelcomeViewController to
log in again.
Note
If you click the logout button and then log in again, all of the todo items entered will be gone. They’re still in MongoDB, but because each anonymous user is given a unique id, they aren’t viewable anymore.
In later stages of this tutorial, we’ll add the ability to sign in with Facebook and Google so that users persist. Stay tuned!
A. Get the Base To-Do Client Application
Estimated Time to Complete: ~10 minutes
Clone the Client App Repository
To get a local copy of the client application GitHub repository on your computer, clone the repo by running the following command in a terminal:
Install the App’s Dependencies
After you’ve cloned the repository to your computer, run the following code in your terminal to navigate into the repo and install the app’s dependencies:
Stitch Browser JS SDK
The base application that you cloned already lists the Stitch Browser SDK as a dependency so this step installs the SDK along with the other dependencies. For other applications, you can install the SDK from npm with the following command:
Explore the Code and File Structure
The GraphQL client is a standard React web application scaffolded with create-react-app that uses GraphQL to interact with your database. We encourage you to explore the files in the app for a few minutes before you continue the tutorial. This will help you to familiarize yourself with what the app contains and where you’ll be working.
Stitch
The /src/stitch directory contains all of the code you’ll use to
connect the application to Stitch. Each file in this directory exports
functions and objects that encapsulate the Stitch component it’s named
after. These files are only incomplete scaffolds. This tutorial walks
through adding the missing code in these files to connect the app to
Stitch.
React Components
The /src/components directory contains pre-built React components
based on components from the reactstrap library and styled with
Emotion. The components import code from the files in /src/stitch
and use them to interact with Stitch. We’ve already completely
implemented the React components so you won’t need to add any code to
the component files.
B. Integrate Your Stitch App
Estimated Time to Complete: ~10 minutes
Once you’re a little more familiar with the app’s file structure
it’s time to get down to business and connect the app to Stitch.
In this section you’ll be adding code to the following files in
/src/stitch:
app.jsgraphql.jsauthentication.js
After you complete this section the to-do client application will be connected to your Stitch backend and you’ll be able to add, complete, and hide to-do tasks through the app.
Connect to Stitch
The first thing that you need to do is connect the client application to your Stitch backend. In this step, you’ll instantiate an app client that provides objects and methods for interacting with Stitch. You need an app client to authenticate users, call Functions, and instantiate service clients.
To get started, navigate to the stitch-tutorial-todo-graphql
repository and open the file /src/stitch/app.js. The file is
incomplete and you will need to add some code to make the app work.
The file should look like this when you first open it:
At the top of the file we import an object named Stitch from the
Stitch Browser SDK. This object contains methods that instantiate and
manage Stitch app clients. Each app client is associated with a single
Stitch app that you specify by providing an App ID when you
instantiate a the client. At the bottom of the file we export the
app object, which should contain aan app client for your Stitch
app.
There are two things you need to do to connect the to-do client to Stitch:
Replace
<YOUR APP ID>with the App ID of your Stitch to-do app.Find Your App ID
You can find your Stitch app’s App ID at the top of the left-hand navigation in the Stitch UI. Click the Copy button ( copy icon ) to copy it to your clipboard.
Instantiate an app client in the
appvariable by adding the following code:
The Stitch object stores initialized app clients and throws an
error if you attempt to initialize a second client with the same App
ID, so we use a ternary expression and three
methods on the Stitch object to create an app client. The ternary
checks to see if an app client has already been initialized and, if
so, uses that instead of initializing a new app client.
Once you’ve added the code to app.js your client application is
connected to Stitch! In the next steps you’ll use the app that you
initialized and exported to actually interact with Stitch and MongoDB
Atlas.
Instantiate a GraphQL Client
You’ve already set up a GraphQL schema in your Stitch app, so now you’ll need to create a client to connect to GraphQL. Apollo Client is a client library that manages connections and data caching for any standard GraphQL API. Apollo packages the core components you need in a single package called apollo-boost.
To install the packages required for using Apollo, run the following:
To create an ApolloClient, open the file /src/stitch/graphql.js.
The file should look like this when you first open it:
At the top of the file we import ApolloClient, HttpLink, and
InMemoryCache from apollo-boost, which we’ll use to instantiate
an ApolloClient. We also import loginAnonymous from
authentication.js, which will allow the ApolloClient to log into
your application anonymously. Note that this function has not yet been
implemented in authentication.js; you’ll add that code in the next
section.
There are two things you need to do to create the ApolloClient:
- Replace
<YOUR GRAPHQL URL>with your GraphQL endpoint. To find this value, select GraphQL under Data Access & Security in the left-hand navigation of the Stitch interface. Then copy the URL at the top of the Explore tab. - Initialize
clientby adding the following code:
We pass in two values when creating a new ApolloClient. The value for
link connects the ApolloClient to Stitch with anonymous
authentication. We also pass in a value for cache, which speeds up
requests by storing local copies of recently-requested data.
Now that you’ve created an ApolloClient, you need to connect it with
your application. Apollo provides the @apollo/react-hooks package which contains a set of
React hooks that you can use to execute GraphQL operations. The
package also contains an ApolloProvider component that makes
your ApolloClient available to all components in your app.
To install the package, run the following:
Open the file /src/index.js. The file should contain the following
code:
Add the following two imports to /src/index.js:
Now you’ll be able to use the GraphQL hooks and access the client
we just created in /src/stitch/graphql.js.
Update the call to render by wrapping your React application
with an ApolloProvider and passing the client that you
created to the provider as a prop. Now any components rendered inside
of the ApolloProvider can use Apollo React hooks to make requests
to your GraphQL client.
How We Use It
In our React app, we use the ApolloClient that you
instantiated to find, add, modify, and remove documents in the
todo.items collection that represent a user’s to-do tasks. We
write each request as a GraphQL query based on the schema you
provided in your Stitch application. These queries are provided to
the useLazyQuery and useMutation Apollo hooks and executed
inside of functions that we return from the useTodoItems hook.
Each function waits for its query to finish and then updates the
React application state based on the query result by calling the
dispatch function.
Set Up Anonymous User Login
Now that you’ve added the code to graphql.js, your client
application has a way to query MongoDB. However Stitch requires that
all requests be made by a user that has logged in through an
authentication provider. Stitch allows you to
configure one or more authentication providers that you can use to
authenticate your app’s users and log them in. You already enabled
Anonymous authentication in your Stitch app, so all that’s left to
do is use the app.auth object to set up the authentication functions
that the to-do client calls.
To set up anonymous authentication in your client app, open the file
/src/stitch/authentication.js. The file should look like this when
you first open it:
At the top of the file we import an AnonymousCredential object
from the Stitch Browser SDK and the app that you defined and
exported from app.js. The AnonymousCredential is an object
that we use to log into Stitch as an anonymous user. The SDK also
provides credential objects for each of the other authentication
providers that Stitch supports, but you won’t need those for now. The
file exports four incomplete functions that we use in our React
components to handle user authentication.
To allow your users to log in and store to-do tasks in Stitch, you need to add code to make the exported authentication functions work.
The main thing you need to do is actually handle a user login request
with the loginAnonymous function. Before implementing this function,
you’ll need to add the following import:
We use the setContext function to create an authorization header
that we pass to the ApolloClient.
Add the following function directly above loginAnonymous:
This function takes in a credential returns an access token
used to authenticate an application user. We’ll call this function
to create an authorization header that gets passed to the ApolloClient.
Finally, add the following code to implement loginAnonymous.
The loginAnonymous function creates an AnonymousCredential and
passes it to the getAccessToken function we just defined. We then call
the setContext Apollo function to create the link used to instantiate
our ApolloClient. Once loginAnonymous is implemented, users can log
into your application anonymously.
You’ll also need to check if a user is currently logged in. Add the
following code to the hadLoggedInUser function:
If there is a logged in user, we want to be able to access their user
object. Add the following code to the getCurrentUser function:
A logged in user should be able to log out of the to-do app. Add
the following code to the logoutCurrentUser function:
Run the To-Do Client Application
Once you’ve added the code to authentication.js you should be able
to log in and track to-do tasks. To run the app, navigate to the root
of the stitch-tutorial-todo-web directory and run the following
command:
The start command builds and serves a local copy of the
application. Once the command output indicates that it is serving the
app, open your browser to localhost:3000 to view the to-do client.
The app should show a login screen when you first start it. Click Log in Anonymously to log in as a new user and then add and check off some to-do tasks. If everything works, then you’ve successfully built the base to-do client!
Summary
Congratulations! You now have a working to-do app that lets users anonymously store, view, and complete to-do tasks.
What’s Next
This is the end of the base to-do client tutorial, but there’s still more that we can add. For example, if a user logs out they will not be able to log in with the same anonymous user account and thus will lose all of their saved to-do tasks. To solve this, we can implement a non-anonymous authentication method like email/password or OAuth 2.0 login for Facebook and Google. Look out for the next part of this tutorial, where we’ll integrate non-anonymous authentication into the to-do app.