Blog App Overview
On this page
In this tutorial, we’ll create a blog and commenting system backed by Stitch. We’ll use Stitch to add and query for comments directly from the client code using the Stitch JavaScript SDK and the MongoDB Service.
Blog App Architecture
A blog requires only a small number of features:
- the ability to log in
- the ability to store a blog post
- the ability to comment on blog posts
As a result, we can keep our Stitch blog app architecture lean. We’ll
use a MongoDB Atlas cluster to store comments and anonymous
authentication to let users post comments with a temporary account. To
keep things simple, we’ll create just one blog post in the HTML of our
blog itself instead of storing it in the database. When users access our
blog, they’ll see our single post right on the front page.
Just by visiting our blog, users create an anonymous account. When
they want to comment, that anonymous account uses the Stitch Browser
Client SDK to push a comment into the blog.comments collection. One
of these comments might look something like this:
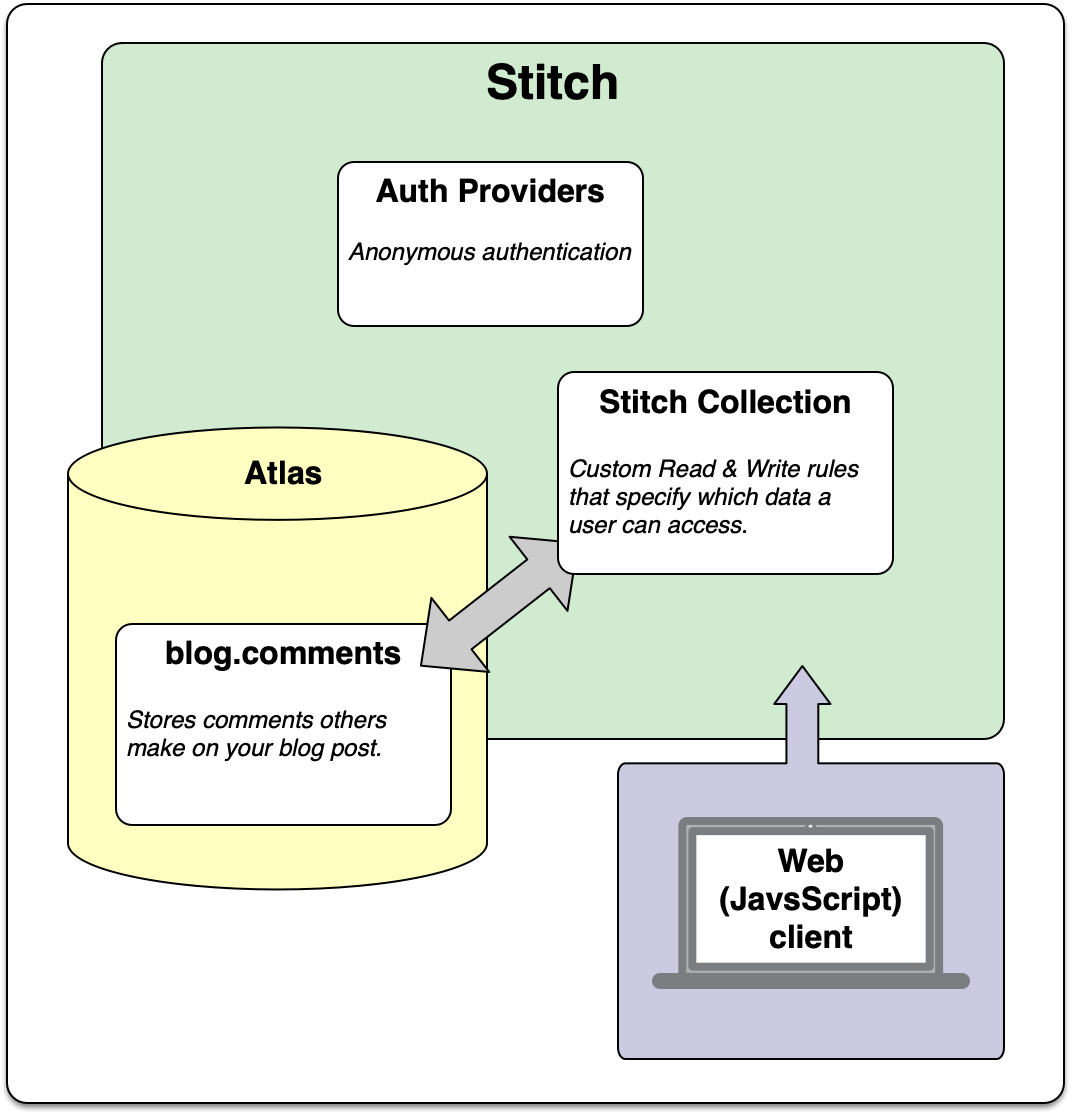
Our architecture has three main components: a web front-end, a Stitch application, and a MongoDB Atlas database. The front-end handles display and user interaction, Stitch handles all requests from the front-end and delegates certain requests to the database, which stores comments for our users. You can see an illustration of this architecture below:
Why Stitch?
You may ask why we’d use Stitch for something like this, considering that we could easily just write an application that talks directly to MongoDB instead. The answer is user management and security: even in this simple case, Stitch user management ensures that no user can update or delete comments that don’t belong to them. Stitch handles both the authentication (login) and authorization (permissions) aspects of user management, and all we have to do is enable anonymous authentication and declare a single access rule. All of the other aspects of user management, SSO, and the boilerplate code normally associated with users is abstracted away and taken care of for us by Stitch. Stitch’s serverless architecture abstracts away servers, routing, and load balancing as well, so we can focus on the content of our blog, rather than the details of how’s it’s being served to an end user.
Guides
The following Guides will walk you through the process of building the Stitch backend app and the client apps.
| Guide | Description |
|---|---|
| Build the Blog Backend | Build a Stitch backend application that integrates Atlas and Anonymous Authentication for the blog. |
| Build a Blog Client | Build a web-based (JavaScript) blog client. |
What Next?
Of course, to keep this guide simple and short we’ve compromised on a few blog features for the sake of simplicity. In this case:
- We’ve hard-coded a single blog post. For a real blog, you’d likely
store your blog posts inside of a
blog.postscollection inside of MongoDB. - We use anonymous authentication, which means users don’t explicitly log into their accounts. Instead, their accounts are created for them. Once their user session is expired, they have to create a new account. For a real blog, you’d probably want to enable a different authentication provider, such as Email/Password or an OAuth 2.0 provider.
- Our blog styling is a little rudimentary. A real blog ought to be more beautiful!
Naturally there are any number of features and improvements you could make to this blog; we’ve only discussed a few of them here. If you enjoy this tutorial and would like to learn more about MongoDB Stitch, these features might be a good place to start learning more!