Define a Function
Overview
You can create and configure functions in your application at any time from the Stitch UI or by importing a function configuration file.
Procedure
- Stitch UI
- Import/Export
Create a New Function
To define a new server-side function from the Stitch UI:
- Click Functions in the left-hand navigation.
- Click New Function in the top right of the Functions page.
Name the New Function
Enter a unique, identifying name for the function in the Name field. This name must be distinct from all other functions in the application.
Configure User Authentication
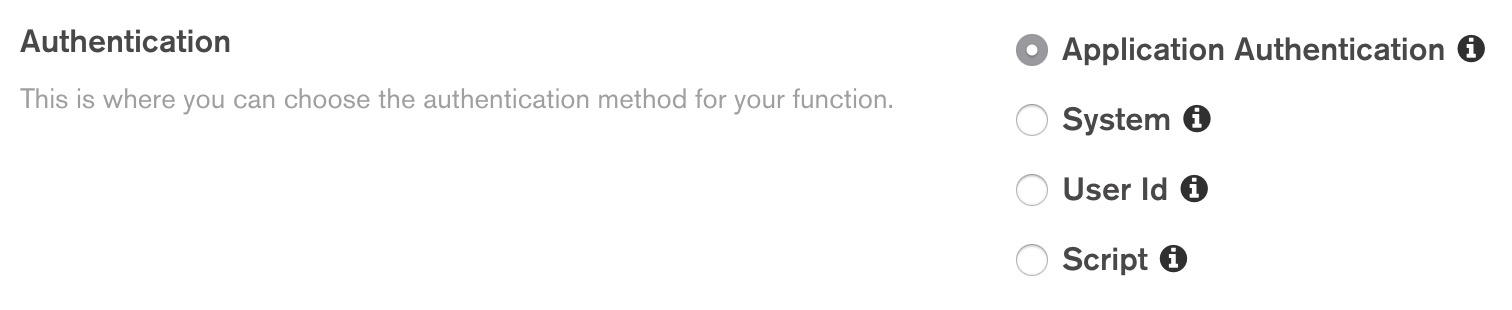
Functions in Stitch always execute in the context of a specific application user or as a system user that bypasses rules. To configure the function’s execution user, specify the type of authentication that Stitch should use.
| Authentication Type | Description |
|---|---|
| Application Authentication | This type of authentication configures a function to run in the context of the existing application user that was logged in when the client application called the function. If the function was called from another function then it inherits the execution user from that function. |
| System | This type of authentication configures a function to run as a system user that has full access to MongoDB CRUD and Aggregation APIs and is not affected by any rules, roles, or permissions. |
| User ID | This type of authentication configures a function to always run as a specific application user. |
| Script | This type of authentication configures a function to run as a
specific application user determined based on the result of a
custom function that you define. The
function must return a specific user’s id string or can
specify a system user by returning { "runAsSystemUser": true
}. |

Specify an Authorization Expression
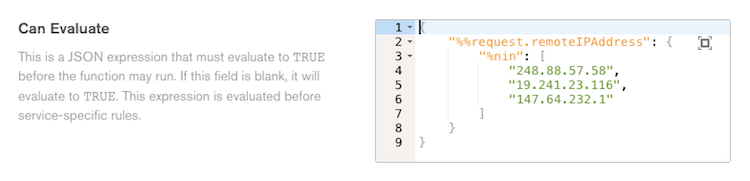
You can dynamically authorize requests based on the contents of each request by defining a Can Evaluate JSON expression. Stitch evaluates the expression whenever the function is called. If you do not specify an expression then Stitch automatically authorizes all authenticated incoming requests.
The expression can expand standard expression variables, including the
%%request and %%user expansions.
Configure the Function’s Privacy Level
By default, you can call a function from client applications as well
as other functions in the same application. You can prevent client
applications from seeing or calling a function by setting
Private to true.
You can still call a private function from JSON expressions and other functions, including incoming webhooks and triggers.

Write the Function Code
Once you’ve created and configured the new function, it’s time to write the actual javascript code that runs when you call the function. You can write the code directly in the Stitch UI using the function editor.
Note
You can use most modern (ES6+) JavaScript features in functions, including async/await, destructuring, and template literals.
From the function’s Settings page:
Click the Function Editor tab.
Add javascript code to the function. At minimum, the code must assign a function to the global variable
exports, as in the following example:
Save the Function
Once you’ve written the function code, click Save from either the Function Editor or Settings tab.
After you save the function, you can begin using it immediately. For more information on using the function, see Call a Function.
Export Your Stitch Application
To create new function with stitch-cli, you need a previously created application configuration.
You can export your application configuration from the Export tab of the Settings page in the Stitch UI, or by running the following command from an authenticated instance of stitch-cli:
Add a Function Configuration Directory
Create a new subdirectory with the same name as the function in the
/functions folder of the application directory that you exported.
Add a Function Configuration File
Add a file named config.json to the new function directory. The
configuration file should have the following form:
Name the New Webhook
Enter a unique, identifying name for the webhook in the Name field. This name must be distinct from all other functions in the application.
Configure User Authentication
Specify the type of authentication that Stitch should use for the webhook. Stitch supports the following webhook authentication methods:
| Authentication Method | Description |
|---|---|
| Application Authentication | This type of authentication configures a function to run in the context of the existing application user that was logged in when the client application called the function. If the function was called from another function then it inherits the execution user from that function. To configure a webhook to use application authentication, set
the value of |
| System | This type of authentication configures a function to run as a system user that has full access to MongoDB CRUD and Aggregation APIs and is not affected by any rules, roles, or permissions. To configure a webhook to run as a system user, do not set any other authentication fields: |
| User ID | This type of authentication configures a function to always run as a specific application user. To configure a webhook to always run as a specific user, set
|
| Script | This type of authentication configures a function to run as a
specific application user determined based on the result of a
custom function that you define. The
function must return a specific user’s To configure a webhook to run as a user determined by a
function, set |
Specify an Authorization Expression
You can dynamically authorize requests based on the contents of each request by defining a Can Evaluate JSON expression. Stitch evaluates the expression whenever the function is called. If you do not specify an expression then Stitch automatically authorizes all authenticated incoming requests.
The expression can expand standard expression variables, including the
%%request and %%user expansions.
Example
The following expression only authorizes incoming requests if the sender’s IP address is not included in the list of addresses.
Configure the Function’s Privacy Level
By default, you can call a function from client applications as well
as other functions in the same application. You can prevent client
applications from seeing or calling a function by setting private
to true.
You can still call a private function from JSON expressions and other functions, including incoming webhooks and triggers.
Write the Function Code
Once you’ve created and configured the new function, it’s time to write the actual javascript code that runs when you call the function.
Add a file named source.js that contains the javascript code for
the function to the new function directory.
Note
You can use most modern (ES6+) JavaScript features in functions, including async/await, destructuring, and template literals.
Import the Function
Once you’ve configured the function and written the source code, all that’s left is to import the function.
Ensure that
config.jsonandsource.jsare saved.Navigate to the root of the exported application directory.
Log in to MongoDB Atlas with
stitch-cli:Import the directory:
Now that you have imported the function, you can begin using it immediately.
For more information on using the function, see Call a Function.